Faucet cartridge replacements are a straightforward and efficient solution for common home repairs involving leaky taps. By quickly replacing worn-out or damaged cartridges, homeowners can stop leaks, reduce water waste, lower utility bills, and extend their fixture's lifespan with minimal DIY skills. This easy home repair involves shutting off the water supply, removing the old cartridge, installing a new one with correct orientation, tightening securely, and testing for leaks upon completion.
Tired of that persistent drip under your sink? It’s likely your faucet cartridge needs a replacement. This simple home repair can stop dripping water waste, save you money on your water bills, and extend your faucet’s lifespan. In this article, we’ll guide you through the process, teaching you how to understand and replace your faucet cartridge effectively and efficiently—a valuable skill for any DIY enthusiast tackling home repairs.
- Understanding Faucet Cartridge Replacements: The Key to Stopping Dripping Water Waste
- Step-by-Step Guide: Effectively Replacing Your Faucet Cartridge for Longevity and Efficiency
Understanding Faucet Cartridge Replacements: The Key to Stopping Dripping Water Waste
Faucet cartridge replacements are a straightforward yet powerful solution for homeowners dealing with leaky taps, a common issue that can lead to significant water waste. These cartridges are designed to control the flow of water through the faucet, ensuring it operates smoothly and efficiently. Understanding how they work is the first step towards fixing dripping water waste at home.
When a faucet cartridge becomes worn out or damaged, it can cause leaks, resulting in constant drips that go unnoticed. Over time, these small drops accumulate, leading to considerable water wastage. Cartridge replacements are a quick and cost-effective fix, requiring minimal DIY skills. By replacing the faulty part, you can instantly stop the leak, reduce water consumption, and potentially lower your utility bills.
Step-by-Step Guide: Effectively Replacing Your Faucet Cartridge for Longevity and Efficiency
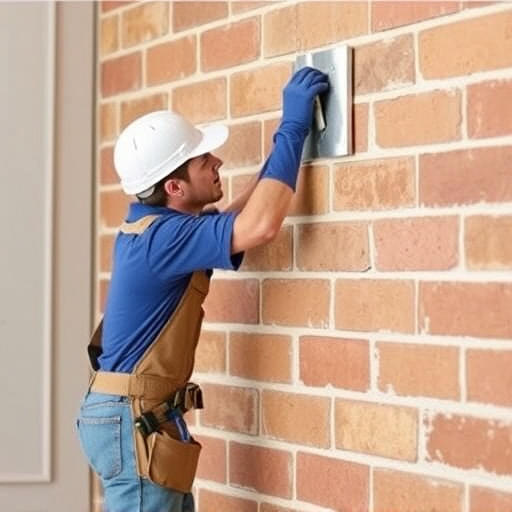
Replacing your faucet cartridge is a straightforward home repair that can significantly improve both the longevity and efficiency of your fixture. Here’s a step-by-step guide to ensure you tackle this task with ease. First, gather the necessary tools, including pliers or a wrench suitable for your faucet’s design, as well as a replacement cartridge compatible with your model. Turn off the water supply to your faucet under the sink. This is crucial to prevent leaks and flooding during the repair process. Once the water is shut off, remove any decorative covers or handles from the faucet. Depending on the model, you might need to twist or lift them out. Next, locate the cartridge and carefully pull it out of its slot. Take note of its orientation, as some cartridges have specific placements. With the old cartridge removed, insert the new one, ensuring it aligns correctly. Secure it in place using your pliers or wrench, being mindful not to overtighten. After installing the replacement, turn on the water supply and test the faucet for any leaks. If there are none, you’ve successfully completed the repair, enhancing both the performance and sustainability of your fixture.
Fixing a dripping faucet with cartridge replacement is an easy and cost-effective way to reduce water waste at home. By following these simple steps, you can efficiently complete the repair, saving money on your water bills and contributing to environmental conservation. Incorporating this quick home repair into your routine maintenance will ensure a more sustainable future for our precious resources.